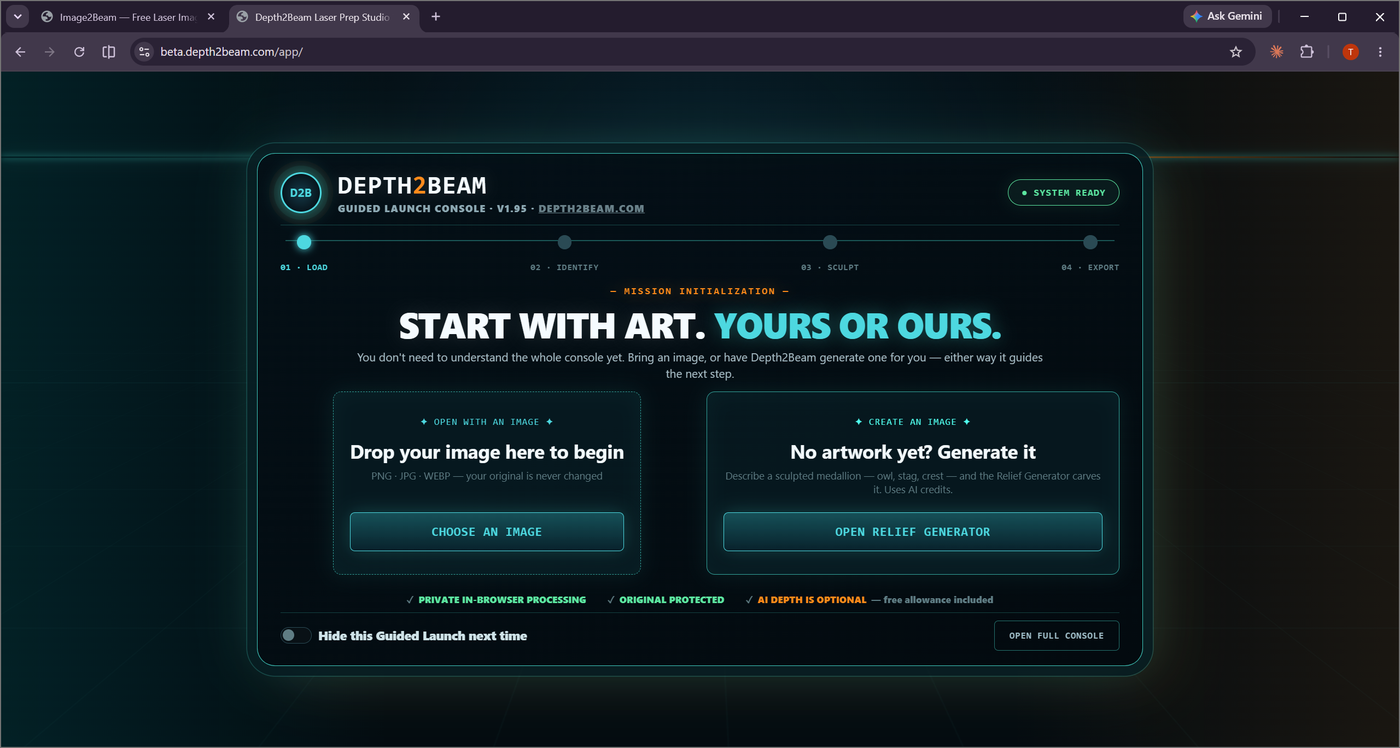
Start with art. Yours or ours.
Every Stacked Layers or Layered Relief job moves through the same four stages of the Guided Launch Console, whether you bring your own image or generate one from scratch. The dedicated Coin Depth Maps workflow is a shortcut through this same pipeline — prompt straight to a coin export, no upload step at all.
Load — bring an image, or generate one
Drop a PNG, JPG, or WEBP and your original is never altered. No artwork yet? Open the Relief Generator instead and describe what you want carved — a sculpted medallion subject like an owl, a stag, or a crest — and let it generate a depth map directly from the prompt.
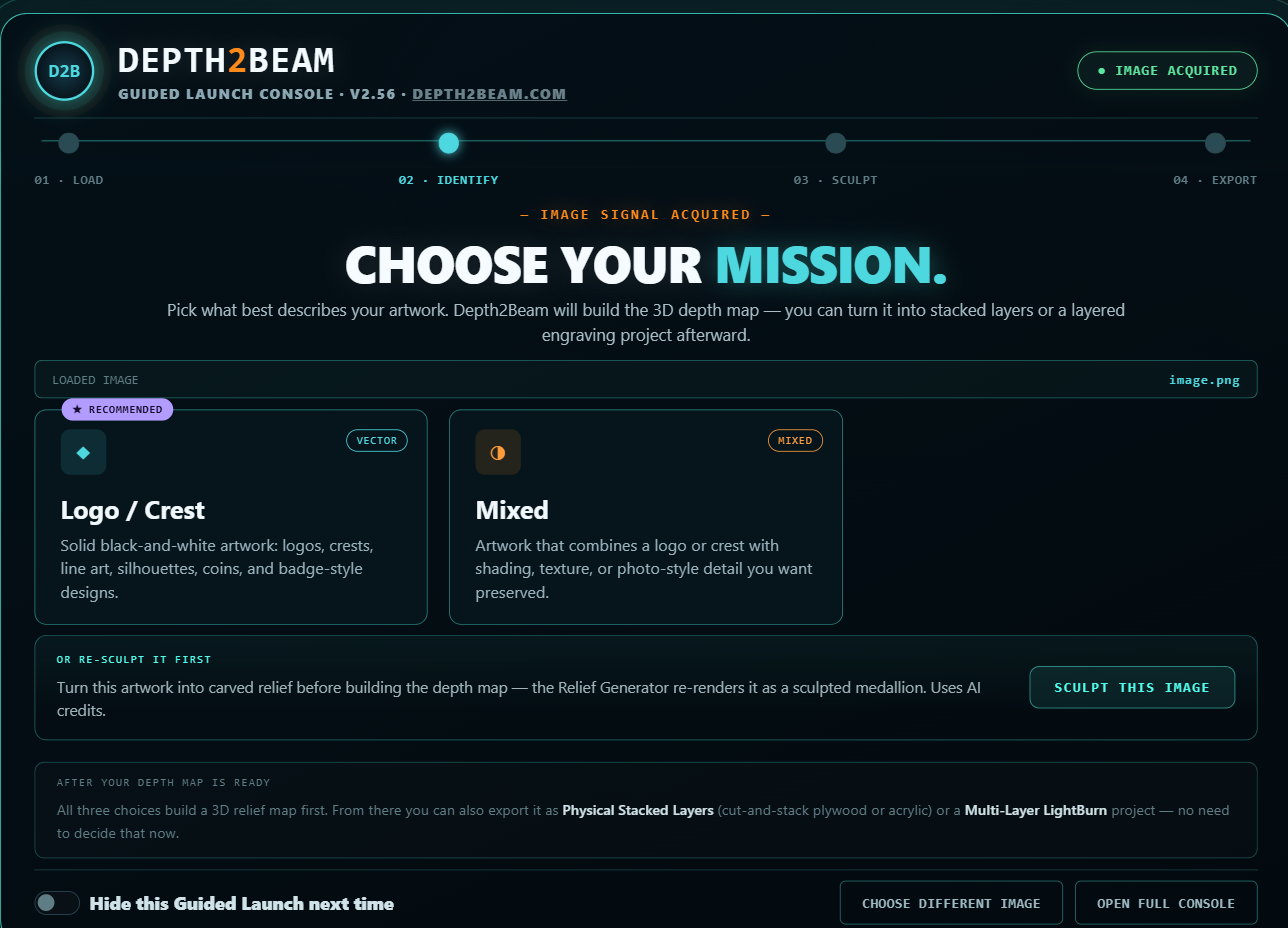
Identify — tell the console what kind of image this is
Auto Prep asks whether the source is a Logo/Crest or Mixed content, and steers you toward the right engine and settings automatically. A real photo or portrait upload is detected and blocked with a message instead of forced through the wrong math. Prefer full control? Skip straight to the Manual Workflow and pick an engine yourself.
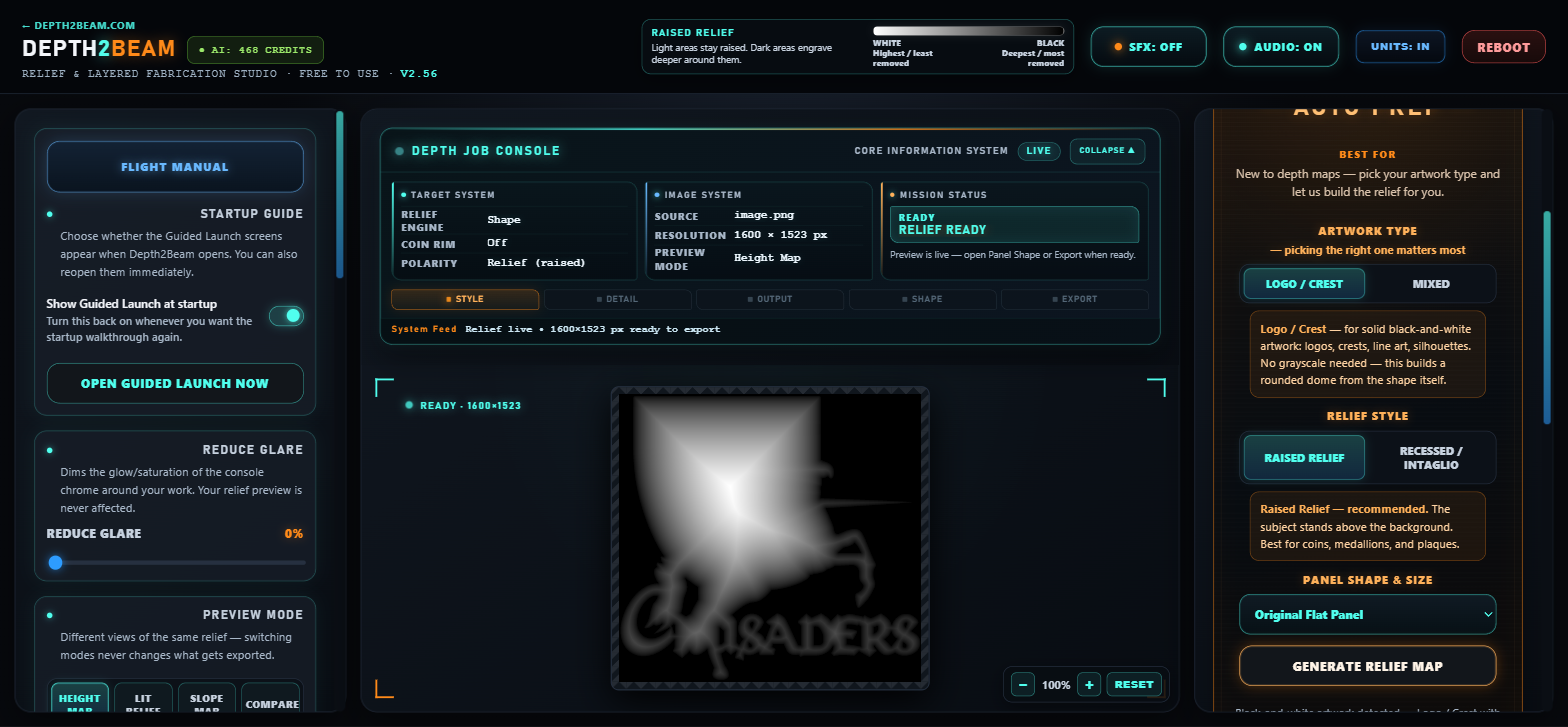
Sculpt — choose an engine and tune the relief
Shape and Blend read your source locally and are free and unlimited. If you generated your source in the Relief Generator instead, an optional AI Depth refinement pass sends that result to a real cloud depth-estimation model for photorealistic, anatomy-aware results at true 16-bit precision, with an optional Surface Detail texture layer. Paint-based masking lets you keep, remove, restore, or smart-remove parts of the subject before sculpting. Preview the result as a Height Map, a raking-light Lit Relief, a Slope Map, or a side-by-side Compare view — switching preview modes never changes what gets exported.
Export — one relief, or a full fabrication job
Crop to a panel shape (coin, coaster, bezel) first, then pick how the relief becomes something physical. A single grayscale Height Map handles continuous-depth engraving in LightBurn, and a true 16-bit Height Map export gives the same relief at full 65,536-level precision — no 8-bit banding — for CNC/CAM tools that read it. An Interactive 3D preview with real millimeter dimensions exports an .STL for CNC, 3D printing, or molds. The Stacked Layers workflow posterizes the depth into vector cut-layers — with kerf compensation and registration marks — that you cut separately and physically stack. The Layered Relief workflow (beta) instead builds one LightBurn .lbrn2 project with every depth band as its own layer, engraved into a single piece of material with an auto power/speed/passes profile scaled to your laser, wattage, and material. A Complete Job Package zips up everything from both layer consoles — plus both height map bit depths — and the editable project file in one archive. (The Coin Depth Maps workflow skips all of this and exports only a coin-cropped height map, straight from the Relief Generator.) See the full export formats overview for all eight.
Save your work, undo freely, reopen it later
Project & History lets you save the complete job — every setting, mask, and layer configuration — as a Depth2Beam project file and reopen it later exactly where you left off, with full undo/redo while you work. Nothing about experimenting with an engine or a layer count is a one-way decision.
See it end to end.
The console guides you through all four stages the first time you open it — you can turn that off later and jump straight to the full console.
Launch Depth2Beam →